
Crawl Space Humidity: What Level Is Too High?
Understand crawl space humidity with a visual temperature example, a practical monitoring log, and a source-first checklist for persistent high readings.
Last reviewed: October 6, 2026
Repeated crawl space humidity readings around or above 60% RH are a reason to investigate moisture conditions. One reading does not diagnose mold, prove a leak, or tell you which repair to buy. Look at temperature, condensation, wet materials, weather patterns, and the crawl space’s design together.
EPA recommends indoor humidity below 60%, ideally 30–50% when possible. That is general indoor moisture guidance, not a universal crawl-space code requirement or a guarantee against mold. A project’s operating target should be documented for its climate, construction, equipment, and drying strategy.
What should crawl space humidity be?
Ask for a target that comes with an explanation. “Set it to 50%” is incomplete advice if nobody has checked for water entry, exposed soil, condensation, or how air moves through the space.
For an intentionally closed or conditioned crawl space, the contractor should state the intended humidity range, how it will be maintained, where it will be measured, and what readings should trigger service. For a vented crawl space, outdoor conditions can strongly affect readings; a permanently low number may require a different design rather than simply a larger machine.
A useful target therefore has two parts: an operating range for the installed system and confirmation that materials are staying dry. A reassuring number in one corner cannot rule out a wet joist, plumbing leak, or cold duct elsewhere.
Relative humidity, dew point, and wood moisture measure different things
| Measurement | What it tells you | What it cannot establish alone |
|---|---|---|
| Relative humidity (RH) | How close the air is to saturation at its current temperature, expressed as a percentage. | The moisture content of every building material or the cause of a damp area. |
| Dew point | The temperature at which air with its current water-vapor content reaches saturation when cooled. | Whether every surface is warm enough to avoid condensation. |
| Material moisture reading | A measurement of moisture in a material, using a suitable instrument and method. | Mold species, structural strength, or the full condition of an inaccessible assembly. |
The National Weather Service explains why RH depends on temperature. If air cools without losing water vapor, its RH rises. A higher nighttime percentage can reflect cooling rather than a new leak. Colder conditions can still bring surfaces closer to condensation.
PNNL’s moisture-flow guide explains that moisture can condense when humid air meets a surface below its dew point. For example, if the local air’s dew point is 65°F, a duct surface at 60°F is cold enough for condensation. Those are illustrative temperatures, not a recommended crawl-space setpoint.
A crawl space humidity example: same moisture, higher reading
Imagine air at 75°F and 50% RH cooling to 65°F. With constant pressure and no water vapor added or removed, its RH becomes about 70%, while its dew point remains about 55°F. This rounded example uses the National Weather Service’s vapor-pressure equations. It illustrates a temperature effect; it is not a record from a home or a recommended operating range.
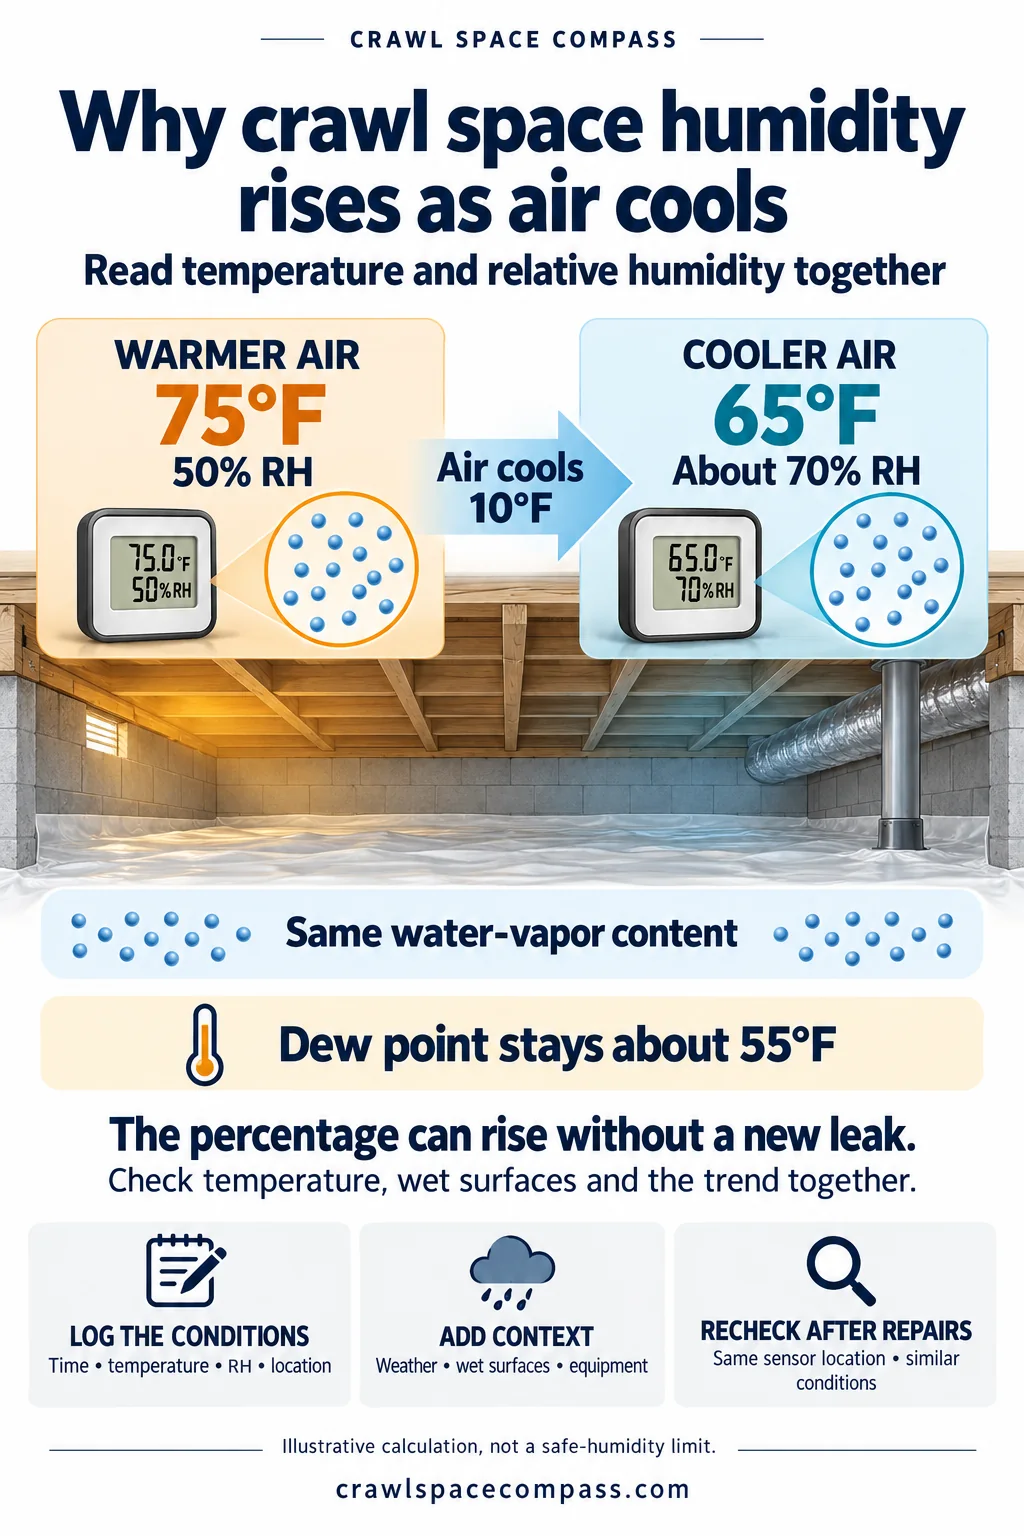
Read the humidity visual as text
- Warmer air: 75°F at 50% relative humidity.
- Air cools 10°F: at the same water-vapor content and pressure, 65°F air reaches about 70% RH. The dew point stays near 55°F.
- Log the conditions: time, temperature, RH, and sensor location.
- Add context: weather, wet surfaces, and equipment operation.
- Recheck after repairs: use the same sensor location and similar conditions.
The percentage can rise without a new leak. Check temperature, wet surfaces, and the trend together. This is an illustrative calculation, not a safe-humidity limit.
That distinction matters when a logger shows an overnight spike. Compare the temperature recorded at the same time. A falling temperature and rising RH can occur together without a new leak. Cooling still reduces the margin between air temperature and dew point, so check for wet surfaces rather than dismissing the change.
If your logger calculates dew point, keep that value with each entry. A changing dew point can help distinguish changing water-vapor content from a temperature-only effect, assuming comparable pressure and reliable readings. It cannot identify where moisture came from. Visible water, recurring condensation, or damp materials still warrant investigation. For wet ductwork, use our duct-condensation checklist to organize an HVAC inspection.
How to measure without collecting misleading readings
Use a hygrometer or data logger that records temperature as well as RH. Read its placement instructions, operating-temperature range, and stated accuracy. Remote readings are useful when they reduce the need for entry.
Do not enter to install or retrieve a sensor when there is standing water near electrical equipment, suspected contamination, unstable framing, dangerous animals, or inadequate access. Have a qualified person evaluate the space first.
- Choose a representative location. Keep the sensor off wet soil and away from direct drips, a vent opening, and a dehumidifier’s discharge air. A sensor sitting in the dry airstream can miss conditions elsewhere.
- Record its position. Label the location and keep it consistent so later readings are comparable.
- Consider a second location. Separated bays or distant corners may behave differently. Use a second sensor to investigate, rather than assuming one device describes the entire crawl.
- Check trends. Automatic logging is helpful; otherwise take readings at different times of day, including during the conditions that usually produce trouble.
- Investigate surprising numbers. Compare nearby instruments after they have stabilized and follow the manufacturer’s checking procedure. Do not start major work solely because of one unverified reading.
These are practical monitoring suggestions, not a certification protocol. PNNL’s crawl-space inspection guide combines visual observations with air humidity and wood-moisture checks, reinforcing the need for more than one kind of evidence.
Keep a seven-day starting log
A week is a useful starting window, not proof of year-round performance. Continue through relevant rain or humid-weather conditions and repeat after repairs. Do not wait to complete the log if you discover active water or another safety issue.
| Record | Why it matters |
|---|---|
| Date, time, temperature, RH, and sensor location | Keeps readings tied to the conditions under which they were taken. |
| Recent rain and outdoor conditions | Helps identify a weather-related pattern without assuming its cause. |
| Water, condensation, odor, and material changes | Adds physical observations that an air sensor cannot supply. |
| Equipment operation and any changes | Shows whether readings changed after service, a power interruption, or a repair. |
Keep photos and notes with the readings. Use the crawl-space inspection checklist to make the information useful to each contractor you consult.
How to check crawl space humidity after a repair
Mark the repair date in your log and keep the sensor in the same documented position. Record any changed setting, power interruption, or equipment service. Compare readings during similar temperatures and weather where possible. A lower RH percentage on a warmer, drier day alone does not show that the original problem is resolved.
Match the follow-up to the original symptom: look for water after rain, check whether ducts still sweat during cooling, or have previously damp materials reassessed with an appropriate moisture meter. Ask the contractor what result should be expected, when to check it, and what would trigger another visit.
Keep the before-and-after readings and photos together. A useful repair record shows both how the air behaved and whether the wetting problem returned. Do not enter an unsafe crawl space to collect evidence; arrange a qualified inspection instead.
What high readings can mean, and what to do next
| Pattern | What to investigate | Practical next step |
|---|---|---|
| Water appears after rain | Runoff, drainage, foundation entry, or groundwater. | Arrange a water-source assessment before sizing drying equipment. |
| Bare or poorly covered damp soil | Ground-vapor contribution and any liquid water below the cover. | Have the ground-cover design and water conditions assessed together. |
| Wet ducts or pipes during cooling season | Surface temperatures, insulation condition, air leakage, and humidity. | Ask an HVAC professional to distinguish condensation from a leak. |
| High humidity persists in a closed crawl | Uncorrected water sources, air leaks, drying-system operation, and condensate disposal. | Compare actual performance with the installation’s documented target. |
| One brief spike without visible wetting | Temperature change, sensor location, and measurement accuracy. | Check the instrument and follow the trend while watching for other evidence. |
EPA’s mold course identifies bare-earth crawl spaces, evaporating soil moisture, groundwater, and condensation as relevant concerns. The table translates those mechanisms into questions; it cannot select a repair without a site assessment.
Why opening vents or adding a dehumidifier may not solve it
Outdoor air does not always provide drying. In humid weather, it can add moisture when it enters a cooler crawl space. Conversely, closing vents without a complete moisture-control plan can leave an enclosed space without adequate drying. Read our crawl-space vent guide before changing the design.
PNNL’s retrofit guidance emphasizes investigating moisture sources, providing a drying mechanism, and checking local requirements when changing insulation or conditioned-air delivery. Combustion safety, soil-gas considerations, and pest-inspection access may also affect a proposed conversion.
A dehumidifier can remove airborne moisture when appropriately selected and installed. It still needs suitable operating conditions, air circulation, maintenance access, and reliable condensate disposal. It does not replace drainage or plumbing repair. Start with the water after rain guide for liquid-water problems and the dehumidifier guide for equipment questions.
Checklist for a moisture-control proposal
- Does it identify the moisture source and supporting observations?
- Does it distinguish liquid-water control, ground-vapor control, and air humidity?
- Does it explain whether the crawl will remain vented or become an intentionally closed system?
- Does it specify the operating target, sensor location, and response if the target is missed?
- Does it include drainage, condensate handling, service access, and maintenance responsibilities where relevant?
- Does it provide a follow-up check during representative weather?
Use these questions when you compare crawl-space quotes. The goal is a documented explanation of the conditions and a way to check the result.
Frequently asked questions
Is 60% crawl-space humidity too high?
It is a useful investigation trigger when repeated or sustained, based on EPA’s general indoor guidance. It is not a universal legal limit. Check temperature trends and visible moisture, and compare readings with the intended operation of the crawl-space system.
Does 50% RH mean there cannot be mold?
No. A sensor measures air at one location and time. Previously wet materials, localized leaks, or cold surfaces can require attention even when that reading looks reassuring. Existing growth requires assessment and appropriate cleanup; our crawl-space mold guide explains how to prepare for that separate evaluation.
Why does humidity rise at night?
Cooling can raise RH without adding water vapor. Compare temperature and RH together before assuming new water has entered. Repeated condensation or damp materials still need investigation.
Should I turn the dehumidifier setting as low as possible?
Use the project’s documented setting and equipment instructions. If it cannot maintain the intended range, investigate water sources, installation, drainage, and operation instead of continually lowering the setting.
When should I call someone?
Arrange help for persistent high readings, recurring condensation, wet materials, unexplained odor, visible growth, or equipment that cannot maintain its target. Keep out when hazards are present. Our contractor directory can help you locate providers; verify their qualifications and compare the investigation and repair scope.
Primary sources checked October 6, 2026. The visual is an illustrative calculation; the monitoring and follow-up workflow is practical editorial guidance.